Showing posts with label food science. Show all posts

Sunday, March 4, 2012

Tip #28 Complete Proteins

Here is another topic I was asked to blog on- complete proteins and combining incomplete proteins to get a complete protein.  Why learn about these?  Well, meat and dairy are your complete proteins and we all know saturated fat and cholesterol often come along with those proteins.  An added bonus is that grains, vegetables and legumes are often cheaper sources of protein.  I am using some clips from a few websites on this post, so I will reference them here in full.  I use websites I feel are reputable and when I recognize the material as sound.  Here is a blip from the CDC website that defines things nicely: http://www.cdc.gov/nutrition/everyone/basics/protein.html

What are the types of protein?

Proteins are made up of amino acids. Think of amino acids as the building blocks. There are 20 different amino acids that join together to make all types of protein. Some of these amino acids can't be made by our bodies, so these are known as essential amino acids. It's essential that our diet provide these.

In the diet, protein sources are labeled according to how many of the essential amino acids they provide:
  •  A complete protein source is one that provides all of the essential amino acids. You may also hear these sources called high quality proteins. Animal-based foods; for example, meat, poultry, fish, milk, eggs, and cheese are considered complete protein sources.
photo of various foods
  • An incomplete protein source is one that is low in one or more of the essential amino acids.Complementary proteins are two or more incomplete protein sources that together provide adequate amounts of all the essential amino acids.
photo of various foods
For example, rice contains low amounts of certain essential amino acids; however, these same essential amino acids are found in greater amounts in dry beans. Similarly, dry beans contain lower amounts of other essential amino acids that can be found in larger amounts in rice. Together, these two foods can provide adequate amounts of all the essential amino acids the body needs.
Quick Q& A
Is it true that complementary proteins must be eaten together to count as a complete protein source?
In the past, it was thought that these complementary proteins needed to be eaten at the same meal for your body to use them together. Now studies show that your body can combine complementary proteins that are eaten within the same day.1


The clincher is when you combine two incomplete proteins to get a complete one, the grain needs to be a WHOLE grain.  All these years, I thought rice and beans would be good enough- no, it needs to be brown rice.  I admit I found that out only a few years ago.  Same goes for bread, spaghetti, tortillas.  They need to be whole grain.  Here is a combining chart I found on this website:  http://www.webnd.com/plant-protein-combinations.php


GROUP #1
"Breads, Cereals, Grains"
Whole Grain Breads such as rye, wheat, oat, rice, spelt, quinoa, Long Grain Brown Rice, Whole wheat products & Whole grain cereals
these include: breakfast cereal, pasta, spaghetti, noodles, wheat products, flour products, etc.
Any item from group # 1 above to be combined with any item from one of the three groups below.
Group # 2
"Legumes"
Peas, Beans
& Lentils:
including all dried beans & peas - black, kidney, pinto, black eyed peas, runner,chick peas, sweet green peas, processed peas, baked beans, beansprouts
Group # 3
"Vegetables"
Leafy Green and Cruciferous Vegetables
including frozen vegetables
Group # 4
Nuts & Seed
Almonds, Pumpkin Seeds, Walnuts, Cashews
Peanuts, etc Sunflower, Sesame & other seeds
As far as I understand it, combining group 2, 3 or 4 together gets your a MORE complete protein than by itself, but not as complete as combining one of those groups with group 1.  Make sense?  Basically, you should try and always get whole grains in your day.  

Now, there is a whole grain that is complete in and of itself.  It's gotten a lot of attention lately.  It is quinoa (keen-wa).  I have enjoyed getting to know this little grain.  It cooks up in about 30 minutes.  HERE is a website that will give you some good instructions on cooking quinoa, and below I have added a chart on some of the non-meat source of protein so you can do some comparisons.

Protein Content of Select Vegetative Foods

Protein Content of Selected Vegetative Foods
FOOD
AMOUNT
PROTEIN(gm)
Tempeh
1 cup
41
Seitan
3 ounces
31
Soybeans, cooked
1 cup
29
Lentils, cooked
1 cup
18
Black beans, cooked
1 cup
15
Kidney beans, cooked
1 cup
13
Veggie burger
1 patty
13
Chickpeas, cooked
1 cup
12
Veggie baked beans
1 cup
12
Pinto beans, cooked
1 cup
12
Black-eyed peas,cooked
1 cup
11
Tofu, firm
4 ounces
11
Lima beans, cooked
1 cup
10
Quinoa, cooked
1 cup
9
Tofu, regular
4 ounces
9
Bagel
1 med.
(3 oz)
9
Peas, cooked
1 cup
9
Textured VegetableProtein (TVP), cooked
1/2 cup
8
Peanut butter
2 Tbsp
8
Veggie dog
1 link
8
Spaghetti, cooked
1 cup
8
Almonds
1/4 cup
8
Soy milk,commercial, plain
1 cup
7
Soy yogurt, plain
6 ounces
6
Bulgur, cooked
1 cup
6
Sunflower seeds
1/4 cup
6
Whole wheat bread
2 slices
5
Cashews
1/4 cup
5
Almond butter
2 Tbsp
5
Brown rice, cooked
1 cup
5
Spinach, cooked
1 cup
5
Broccoli, cooked
1 cup
4
Potato
1 med.
(6 oz)
4
Sources: USDA Nutrient Database for Standard Reference, Release18, 2005 and manufacturers' information.


Us Americans get plenty of protein- mostly because we get PLENTY of meat and dairy.  Why not try and cut some meat out of your diet and try some of these combinations!  Good luck and . . . 
~Here's to Healthy Eating

Thursday, February 2, 2012

Food Science Sunday: Doubling recipes

Have you ever tried to double or triple a recipe and had it go horribly wrong?  Something is off about the texture, it doesn't cook right or rise enough or too much.  Maybe the spices in the soup are too powerful or there is too much liquid and your sauce doesn't thicken.  The reason is because to be truly accurate, you should first convert all your ingredients from measures into weights.  You need tables to help you with this.  One teaspoon of sugar weighs more than 1 tsp of baking soda.  Sugar is just heavier.  This online website could be helpful.  Click HERE.  You pick an ingredient (if they don't have the exact one, something similar will probably be fine) and put into the table whatever measure you have.  Then press convert and it will tell you all the conversions.  Take your weight and multiply it by the increase in recipe you desire (double or triple or even 1.5 or 2.5 are more accurate this way).  Then put your new weight in and convert it back to measurements.  I know it sounds like a lot of work, but it really can be helpful.  Especially when you are hosting a dinner or taking a large dish of something to an event.  I know for myself, I will definitely be using this tool more often!

~Here's to Healthy Eating

Sunday, November 13, 2011

Split Pea Soup and Food Science Sunday

Yesterday I made split pea soup.  It was such a grey, miserable day in Seattle we also had soup for lunch.  It was soup day.
My mom gave me this recipe, and it is delicious.  Here it is:

Split Pea Soup
8 cups water
3 14 oz. cans reduced sodium chicken broth
1 lb. cooked boneless ham chopped or ham bone with meat
4 ½ cups dry split peas, rinsed and drained
3 bay leaves
¼ tsp. Dried marjoram, crushed
¼ tsp. ground black pepper
1 ½ cups chopped carrots (3 medium)
1 ½ cups chopped celery (3 medium)
1 ½ cups chopped onion (2 medium)
salt and pepper to taste
In a 7 – 8 quart Dutch oven combine water, broth, ham, split peas, bay leaves, marjoram and peppr. Bring mixture to boiling, reduce heat. Simmer covered 1 hour. Stirring occasionally. Uncover, stir in carrots, celery and onions. Bring to boiling. Reducee heat. Simmer, covered  for 20 – 25 minutes or until vegetables are tender. Season to taste with salt and pepper. Remove bay leaves, discard. Stir to combine. Serve immediately or cool 30 minutes.
To freeze divide cooled soup among three 2 quart freezer containers. Cover, label and freeze up to 3 months.
To reheat frozen soup, dip the bottom of the container in hot water for 5 minutes. Transfer frozen soup to a large saucepan. Cook, covered, over medium low heat about 30 minutes or until heated through, stirring occasionally. Makes 12 servings.


Here is what I changed:  I didn't have celery (I am not in love with celery anyway), so I added some celery salt, some celery leaves and diced up 2 potatoes to make up some of the bulk (plus I love potatoes).  I boiled the split peas with the ham bone too long and my split peas were nearing oblivion, and I like a little texture to my split pea soup, so I turned off the heat and removed the pan from the unit.  I cooked my diced veggies in a different pan by themselves.  I used a large stainless steel shallow pot with lid, I sauted the onions first, added the carrots and potatoes, a little water and put the lid on to let them soften up.  This will cook up your veggies nice a fast- the wider the pan, the better. Watch for sticking and scorching.  Within 10 minutes or so I had nice and soft veggies to add to my soup.  The soup didn't have to cook anymore and my split peas still had a little lumpiness left, the way I like them.   Here is another part of this tip- I have realized that my heavy bottomed stainless steel pots and pan keep my food really hot for a really long time.  Although this is nice for some recipes, other foods it can ruin.  I have learned the hard way I have to remove pastas and light sauces immediately from the pans or they will continue to cook, making them overdone and evaporating all the moisture.  So watch that on your pans.

Stay tuned for more about breakfasts, reader suggestions and more tips to come.  Now that every last apple is canned, I feel like a woman with a burden lifted off my shoulders!

~Here's to Healthy Eating

Sunday, November 6, 2011

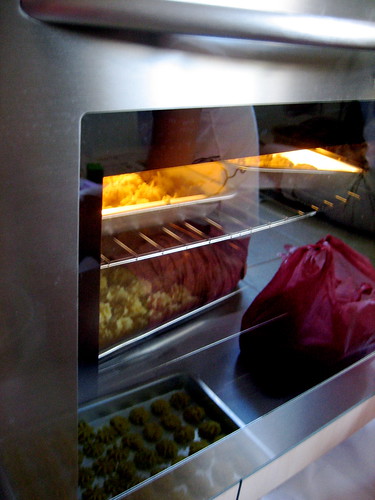
Tip #22 Overcoming an overcrowded oven


How did you fare over Halloween?  Thanksgiving is right around the corner and parties are being planned as we speak.  Here is a good tip for cooking for a crowd.  Recently someone called with a question:  she wanted to know if she had too much stuff in her oven and how it would affect her food.  Everyone's oven is different, but generally speaking an overcrowded oven means 2 things.  1) It will take longer for your food to cook and 2) It will cook unevenly- you may have overdone spots and underdone spots.  Most ovens rely on air to evenly distribute the heat.  You should try and have at least 1-2 inches of space between pans and nothing should touch the oven walls.  I have this problem when I roast vegetables.  I usually want to roast more than one sheet of  veggies at a time, i.e. the asparagus I want to roast won't all fit on one sheet.  I use 2 racks and put one sheet on the far left and one on the far right and rotate them halfway through.  It's a bit risky- sometimes the asparagus on the lower rack comes out more steamed than roasted, but I have had moderate success. If you are crowding more things into your oven than you think is probably wise, try lowering your heat 5-10 degrees, rotating and moving pans from high to low, back to front and left and right once or twice during cooking and give yourself more time to get everything done.  Make sure the edge of the pan that was facing the middle now faces the outside when you move it.  The outside cooks fastest.  That brings me to another point:  put your thickest cut meats at the edges of your pans, and thinner or smaller cuts in the middle.

Good luck!
~Here's to Healthy Eating


Sunday, October 16, 2011

Food Science Sunday

Friday night I found something I fell in love with- a show called Top Secret Recipe on CMT (of all places) where this hilarious guy tries to crack the secret recipes of famous foods like Cinnabon cinnamon rolls and KFC fried chicken.  He has a food truck (lab) and 3 days and he will pretty much do anything like stealing some cinnamon while on tour of a factory to try and re-create the signature recipes.  So much food science and so much fun.  You can check his show out HERE.  That's my dream job.  I love food science.  Who knew that the original Cinna"mom" lives on Bainbridge Island which is a 30 minute ferry ride from here?  Not me.

On to my week- it was full of experiments.  Times like this when the budget is tight, I don't do a lot of menu planning from recipes like my favorite magazine,  Everyday Food.  Instead I buy meat and veggies on sale and play with what I have.  This week I had some leftover green salsa that needed to be used and some corn tortillas that were getting stale in the fridge.
 So I decided to improvise some green enchiladas.  I knew the fresh tomatillo salsa would not make a good sauce as it was, so I pureed it in the blender to get out the chunks and added it to a shallow pot with a cup of chicken broth.  I brought that to a simmer and added 1 TB of cornstarch mixed with a little cold water.  Now I had a cooked sauce with a little body to it that would not just soak into my tortillas. If my salsa hadn't been so flavorful, I might have needed to add some cumin or even coriander to the sauce.    For the filling I cooked about 1 chicken breast and diced it and then added 1 can of white beans.  Pinto would have been better, but I didn't have any.  I mixed in 1/2 cup of my sauce to the chicken/bean mixture.  I made sure it was nice and hot.  I heated my tortillas (cooking one at a time in a dry skillet and then keeping warm in a tortilla warmer is optimal).  I filled each tortilla with chicken/bean mix, placed it in a pan and after having several lined up, I drizzled the sauce across the middle and sprinkled some cheese across the top.  I broiled them with the rack in the middle- heats and crisps the cheese on the top a little slower.  I have found that enchiladas work best this way for me.  I have all parts of the enchilada hot- the sauce, the filling, the tortillas and then I quickly build them and broil in the oven instead of baking for any length of time.  This keeps my tortillas from getting soggy.
I had some Cojita cheese which is like Parmesan for Mexican food.  We put this on top and drizzled with my version of Mexican creme.  I mixed some light sour cream with a little cream, a spoonful of low fat plain yogurt and a little milk to make just the right consistency.  The enchiladas turned out decent and the best part was the kids ate them up and had seconds.  Sometimes when we have things that are a little different, that isn't the story.  This would be a good gluten free meal as long as your salsa were free of any gluten.

Once you follow a recipe (or look at several versions) and get a feel for what ingredients are needed for a desired result, you can make any changes you need to make.  I wanted to make a creamed corn casserole Friday night for a dinner party, but didn't have the corn bread mix it called for or the bread crumbs.  I know corn bread mix has cornmeal, flour and things like salt and maybe baking powder in it.  I was able to add those things and the consistency turned out right.  The bread crumbs were for both the casserole body and a crunchy topping on top.  I melted a little butter in my cast iron skillet and added panko when it got hot.  I browned the panko so it would have flavor and color and used that in place of the bread crumbs.  We all enjoyed it and my guests didn't know that I didn't follow a recipe.
~Here's to Healthy Eating (and improvising)

Sunday, September 25, 2011

Food Science Sunday

Today is more of a recipe than about Food Science.  When I make a substitution in a recipe, I have to use some food science tricks to make sure that item will work.  This is about preserving that great watermelon.  There is a group of women who go to my church that get together once a month and make a recipe from the Sunset magazine- Sunset is based on the Northwest, so they are usually featuring foods that grow in our area.  When I went a couple months ago, I brought a bender drink to sip on as we waited to eat. HERE is the original recipe (turns out it was from Cooking Light!) and you can look HERE for all kinds of amazing recipes with watermelon.
First of all, cube your watermelon and freeze on a large cookie sheet for at least 4 hours- remove and put in a large container to be used when you want to whip up this cooler.  You need at least 5 cups of cubed watermelon.

Watermelon Cooler
5 cups frozen watermelon cubes
1/2 can frozen limeade concentrate
3/4 cup pineapple juice
1 tsp rum flavoring
1/2 cup chopped mint leaves
Sparkling water, club soda or ginger ale

Blend all ingredients except soda water in blender (may need to do batches).
The original recipe called for rum and too much limeade.  I wanted to try the flavor of the rum with mint, but I don't drink alcohol.  I knew the juice that lent itself to the rum taste the best was probably pineapple, so I swapped that in with rum flavoring.  I think blending the club soda or sparkling water takes the fizz out, so I would pour your watermelon slush into a pitcher and then add the soda water to taste, stir gently.  Ginger ale would make it more sweet, you play with what you like.  We all really enjoyed this cooler, the mint and rum flavor and lime and watermelon all go together really well.

~Here's to Healthy Eating

Sunday, September 18, 2011

Food Science Sunday


This could also be titled Food Safety Sunday.  As I fixed my girls lunch today, I was tempted to take a bite out of their saucepan of soup and put the spoon back in.  This is not a good idea for 2 reasons:  of course the germs from my mouth can multiply and spread to others who will eat the soup- especially when the soup is in the "danger zone"- between 41 and 140 degrees F.  The longer your food is between these temps, the higher the risk of bacteria multiplication.  But another reason that some people might not realize is that our saliva actually contains the enzyme amylase that helps in breaking down food.  Digestion starts in your mouth!  This is most important in simple carbohydrate foods like yogurt- if you eat half of a carton of yogurt and put the other in the fridge, the next day you will notice that it's all watery and broken down.  That's your amylase at work.  (As a side note to moms- this is why a dentist will tell you not to use the same spoon as your little one when testing their baby food or showing them how yummy their dinner is.  Your amylase can actually damage their baby teeth as well.  Fascinating stuff!)
~Here's to Healthy Eating


Sunday, September 11, 2011

Food Science Sunday


Today's food science tip is pretty simple.  Water evaporates.  Any time you are making something in which you measure water, wait until it boils and then take your next cooking step, it's important you don't let the water boil long.  Here are two examples that come up all the time in my kitchen:  When I make rice I measure the water, let it boil and then add the rice.  If I step away from the kitchen and come back to a pot with steam pouring out of it, I know I have lost too much water and usually start over.  I measured the water one time just to see how much water I had lost and I was over 1/2 cup short for my rice.  Another time this is important is when I make bread.  I use a recipe that calls for adding boiling water at one step.  If I have let the water boil too long, I know my bread will be lacking some of the needed moisture.  Always keep a lid on a pot of water if it's measured for a recipe (less water will evaporate), stay close to the kitchen and if you know you will need some time before the water boils, start it on medium instead of high.  If you like to steam vegetables over a pan of boiling water and are like me and often forget to check things, try putting a ring that goes on a canning bottle or lightweight lid with a lip in the bottom pan of water.  When the water boils out, the ring will start to rattle, letting you know to add water ASAP.  I scorched a pan under a steamer full of carrots (for a dinner party, no less) and the result was steamed carrots that tasted like they had been smoked over a campfire.  Not completely inedible, my guest was gracious.
~Here's to Healthy Eating

Sunday, September 4, 2011

Food Science Sunday

Food science Sunday will be it's own category from now on instead of a tip.  Tonight I made a recipe I saw in an Everyday Food magazine.  I just happened to have most of the ingredients.  HERE is the recipe.  Arugula, Chicken and Rice salad.  Well, I don't usually have arugula lying around, so for that I subbed in romaine lettuce.  Arugula has the texture of spinach (to me) and is described as tasting "peppery".  I think it's good on a pizza, for the base of a main dish salad that I am feeding to kids- I opt for romaine.  For the rice I had some leftover cooked quinoa, but it had turned out a bit mushy.  I knew this recipe needed a grain that was fluffy and separated nicely so that the dressing could coat each grain (and that is probably the reason they called for long grain.  Long grain rice cooks up and separates much more than short grain rice which sticks together).  Put dressing on a ball of sticky rice and you can imagine the results.  So I cooked up a cup of rice, carefully measuring the water.  When I want stickier rice for an Asian dish, I am more liberal with my water and cooking times (also rinsing your rice before cooking makes it much stickier).  When it was cooked, I fluffed the rice with a fork, covered the pot with a dishtowel and let it cool.  The towel absorbs excess moisture and I knew that pouring the dressing on hot rice would also make the texture and flavor less appealing.  Hot rice would soak up the dressing too much and heat would alter the fresh herbs that made up the dressing.  I mixed some of my quinoa, some rice and the chicken for that part of the salad, it was delicious.  I added orange bell pepper and cucumber along with the tomatoes for more nutrition and color.  Coming up:  my favorite granola recipe per request.
~Here's to Healthy Eating

Sunday, August 28, 2011

Tip #10 Food Science Sunday


One way I like to "pay" my friends back for favors, etc is by making cinnamon rolls. Here is one of those items you need to have a reason to make and a lot of people to feed them to. Because no one should have a whole recipe of rolls sitting around their kitchen (all right, that "no one" is me). There are 2 things- ok, 3 things I can hardly resist if they're in my vicinity: 1) chocolate chip cookies 2) brownies with walnuts 3) cinnamon rolls. By the way, all treats in moderation and satisfying your cravings will be other tips for another day.
The best recipe I have ever had for cinnamon rolls can be found HERE. It calls for scalding your milk/sugar/oil mixture. Scalding is bringing milk almost to a boil, then letting it cool. I knew there was a food science moment hidden here, and even though I could not remember the exact reason for scalding from my 4-H years and food science classes, I decided to look into it. Apparently old recipes often call for scalding milk because milk wasn't pasteurized and there was a bacteria that would interfere with thickening in some recipes (and I suspect maybe mess with your yeast as well?). But now that all our milk is pasteurized, apparently it's not necessary. You heat the milk to help with the yeast growth, but you have to let it cool first - too hot and it will kill the yeast of course. Some people seem to argue that scalding milk helps break down some of the milk proteins or enzymes which would inhibit the gluten and therefore they get a better product from using scalded milk. I will say a couple of things: my favorite roll recipes all use scalded milk; scalding would evaporate some of the water off your milk, creating more of an evaporated milk type product which produces smoother, creamier results. Whether it's just the "old fashioned" way of doing things or not, I'll probably keep up the tradition!
~Here's to Healthy (and delicious) Eating

Sunday, August 21, 2011

Tip #4 Food Science Sunday

Another part of this blog is sharing the ingredient substitutions I make in recipes and why they might work/don't work. Tonight's dinner plans were changed last minute. Our friend Hermes brought over a salmon he caught this morning. Can't pass that up! To think this nice pink salmon was swimming in Puget Sound this morning and tonight was on my plate is very exciting to me! I love to broil salmon with a simple teriyaki glaze. Usually I use a recipe with brown sugar from Everyday Food, but when I looked for it online, I saw this one from Mad Hungry- a spin off of Everyday Food.
Click here for the recipe. I did not have the fresh ginger, but decided to go with it anyway. Fresh ginger is one of those ingredients that when you need it, you really need it- but it's hard to keep on hand. My tip (which I need to follow) is to buy a bigger piece of ginger than you need, peel and grate the extra and freeze it. I have only had marginal success keeping ginger more fresh in my crisper inside a paper bag- but it does last longer than usual that way. Most vegetables mold fastest inside plastic bags. I did use the ground ginger powder in the teriyaki recipe and the result was just fine, but the fresh ginger would have made the dish really pop. The salmon was so delicious, no one really missed it. I like teriyaki because it seems to flavor the salmon without overpowering it. I blanched sugar snap peas from our garden and tossed them with the Asian dressing from the salad recipe here.
The real crazy food science moment of the day came when I made a fruit smoothie out of frozen strawberries and blueberries, plain lowfat yogurt, milk, some vanilla and a dash of sugar. The result was creamy and smooth, but 2 hrs later the leftovers in the bottom of the blender were quite altered. It still tasted fine, but the texture was a mess! The body of the smoothie had congealed almost to the point of a soft gelatin or tofu and left a watery mess underneath. My immediate suspicion was that the high level of pectin in the blueberries was the culprit. Sure enough, I looked around online and saw that others had had the same experience. Click here
Pectin is found a lot in fruits, is great for thickening things and is part of soluble fiber, so it can help lower blood cholesterol- but be careful you don't make a smoothie too early before your guests arrive!