Sunday, November 20, 2011

Tip #24 Making breakfast ahead of time


Cold mornings and the high price of cereal make me want a hot breakfast most mornings.  A teething 6 month old makes me want to not get up early to make a hot breakfast most mornings.  Enter:  the pre-made hot breakfast.  Saturday mornings are all about pancakes around here.  I have started making a double recipe and putting the leftover pancakes in a large ziploc bag to be re-heated later in the week.  This works like a charm.  The girls love a heated up pancake.  Same with french toast.  I usually re-heat them one at time on a small plate for them.  In order to get some fiber and protein for satiety, I try and make whole wheat pancakes.  My favorite recipe is the following:
Whole Wheat Blender Pancakes
1 cup milk
1 cup uncooked whole wheat
Blend in blender for 4 minutes
Add:
1/2 cup milk
Blend for another 4 minutes
Add:
2 eggs 
1/2 cup oil (try using less)
3 teaspoons baking powder
2 tablespoons honey or sugar
½ teaspoon salt
Blend remaining ingredients and cook on hot griddle- batter will be thin.


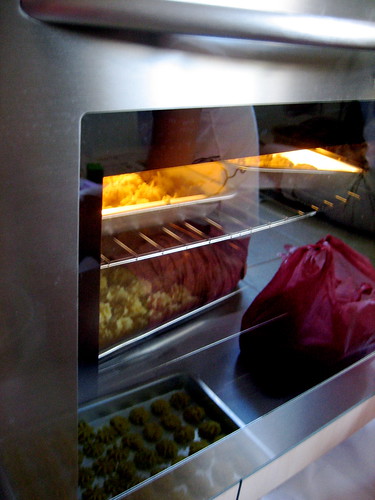
I also made the baked oatmeal on a weekend night and we enjoyed heating bowls of that up through the week.  I made the recipe with whole oats as I planned and it turned out fine (I made 1 and 1/2 times the recipe for a full 9 x 13).  I don't think instant oats are needed there.  I have also gotten bags of whole wheat English Muffins at the bakery outlets and made lots of egg/cheese (sometimes ham) sandwiches on weekends and wrapped them and froze them to be reheated individually.  This can be tricky - when you reheat them sometimes the English Muffin can get tough.  So I think letting it thaw first is probably the wisest decision.  My mother in law made breakfast burritos for a reunion that we reheated in the oven- they were wrapped in foil.  This works really well compared to the microwave.  My sister makes a huge pot of steel cut oats with a lot of goodies in it- apples, nuts, etc and she and hubby re-warm it by the bowlful throughout the week.  All of these options are great ideas!  Just eat breakfast, whatever you prefer to do.


~Here's to Healthy Eating

Saturday, November 19, 2011

Tip #23 Take your time

Now that our family has a rigid schedule for the first time ever (kindergarten) I find myself trying to get the kids to "hurry up and eat breakfast so we can get to school" and "hurry up and eat dinner" so we can get into bed and not be tired for school and "hurry up and eat snack" so they can do homework and a myriad of other activities.  Don't get me started about Sundays and making it to church.  Often we have resorted to races:  "whoever can finish before mom wins!"
But I have noticed that all this hurrying leads to hiccups, upset tummies and I hardly chew my food.  This is bad- very bad.  One of the best things you can do for yourself health-wise is take your time eating and enjoy your meal.  Chew thoroughly and make sure you are "present" while eating.  Don't try and do other activities, your mind just doesn't process the meal the same way and you come away less satisfied.  I heard a story on the radio about people who follow a raw food diet.  They don't eat anything that's been cooked.  Think about that one.  Grains?  They soak them and chew, chew, chew.  One raw food dieter said that is one of the best things about the diet- you have to chew the heck out of your food.  You really have to appreciate it's flavors, textures and take your time to eat.  You have all heard of other cultures and how they take their time to eat:  Japan and all those small dishes of different items plus using chopsticks usually = taking smaller bites.  European culture (especially French) who take a long time to enjoy many courses of foods.  This is far healthier than our uber fast lunches at the desk we are notorious for.  So, take a little more time.  As with anything that comes down to scheduling, it's all about priorities.  You gotta feel it's important enough to start a little earlier and enjoy your meal.

~Here's to Healthy Eating

Sunday, November 13, 2011

Split Pea Soup and Food Science Sunday

Yesterday I made split pea soup.  It was such a grey, miserable day in Seattle we also had soup for lunch.  It was soup day.
My mom gave me this recipe, and it is delicious.  Here it is:

Split Pea Soup
8 cups water
3 14 oz. cans reduced sodium chicken broth
1 lb. cooked boneless ham chopped or ham bone with meat
4 ½ cups dry split peas, rinsed and drained
3 bay leaves
¼ tsp. Dried marjoram, crushed
¼ tsp. ground black pepper
1 ½ cups chopped carrots (3 medium)
1 ½ cups chopped celery (3 medium)
1 ½ cups chopped onion (2 medium)
salt and pepper to taste
In a 7 – 8 quart Dutch oven combine water, broth, ham, split peas, bay leaves, marjoram and peppr. Bring mixture to boiling, reduce heat. Simmer covered 1 hour. Stirring occasionally. Uncover, stir in carrots, celery and onions. Bring to boiling. Reducee heat. Simmer, covered  for 20 – 25 minutes or until vegetables are tender. Season to taste with salt and pepper. Remove bay leaves, discard. Stir to combine. Serve immediately or cool 30 minutes.
To freeze divide cooled soup among three 2 quart freezer containers. Cover, label and freeze up to 3 months.
To reheat frozen soup, dip the bottom of the container in hot water for 5 minutes. Transfer frozen soup to a large saucepan. Cook, covered, over medium low heat about 30 minutes or until heated through, stirring occasionally. Makes 12 servings.


Here is what I changed:  I didn't have celery (I am not in love with celery anyway), so I added some celery salt, some celery leaves and diced up 2 potatoes to make up some of the bulk (plus I love potatoes).  I boiled the split peas with the ham bone too long and my split peas were nearing oblivion, and I like a little texture to my split pea soup, so I turned off the heat and removed the pan from the unit.  I cooked my diced veggies in a different pan by themselves.  I used a large stainless steel shallow pot with lid, I sauted the onions first, added the carrots and potatoes, a little water and put the lid on to let them soften up.  This will cook up your veggies nice a fast- the wider the pan, the better. Watch for sticking and scorching.  Within 10 minutes or so I had nice and soft veggies to add to my soup.  The soup didn't have to cook anymore and my split peas still had a little lumpiness left, the way I like them.   Here is another part of this tip- I have realized that my heavy bottomed stainless steel pots and pan keep my food really hot for a really long time.  Although this is nice for some recipes, other foods it can ruin.  I have learned the hard way I have to remove pastas and light sauces immediately from the pans or they will continue to cook, making them overdone and evaporating all the moisture.  So watch that on your pans.

Stay tuned for more about breakfasts, reader suggestions and more tips to come.  Now that every last apple is canned, I feel like a woman with a burden lifted off my shoulders!

~Here's to Healthy Eating

Sunday, November 6, 2011

Tip #22 Overcoming an overcrowded oven


How did you fare over Halloween?  Thanksgiving is right around the corner and parties are being planned as we speak.  Here is a good tip for cooking for a crowd.  Recently someone called with a question:  she wanted to know if she had too much stuff in her oven and how it would affect her food.  Everyone's oven is different, but generally speaking an overcrowded oven means 2 things.  1) It will take longer for your food to cook and 2) It will cook unevenly- you may have overdone spots and underdone spots.  Most ovens rely on air to evenly distribute the heat.  You should try and have at least 1-2 inches of space between pans and nothing should touch the oven walls.  I have this problem when I roast vegetables.  I usually want to roast more than one sheet of  veggies at a time, i.e. the asparagus I want to roast won't all fit on one sheet.  I use 2 racks and put one sheet on the far left and one on the far right and rotate them halfway through.  It's a bit risky- sometimes the asparagus on the lower rack comes out more steamed than roasted, but I have had moderate success. If you are crowding more things into your oven than you think is probably wise, try lowering your heat 5-10 degrees, rotating and moving pans from high to low, back to front and left and right once or twice during cooking and give yourself more time to get everything done.  Make sure the edge of the pan that was facing the middle now faces the outside when you move it.  The outside cooks fastest.  That brings me to another point:  put your thickest cut meats at the edges of your pans, and thinner or smaller cuts in the middle.

Good luck!
~Here's to Healthy Eating